How to Update Cricut Firmware? [Cutting Machine & Heat Presses]

Cricut firmware is pre-installed software that commands the cutting machine about how to run. The users frequently update the software for better performance and enjoy the benefits of newly released features. One of the interesting facts which makes the firmware different is that it is available for all the models along with the heat presses.

However, all users must conclude the update process by following the step-by-step instructions. After completing the machine/press setup, users are allowed to begin the renovation procedure. Further in the blog, you’ll get introduced to the total number of stages for the machine & heat presses.

How to Update Cricut Firmware on PCs?

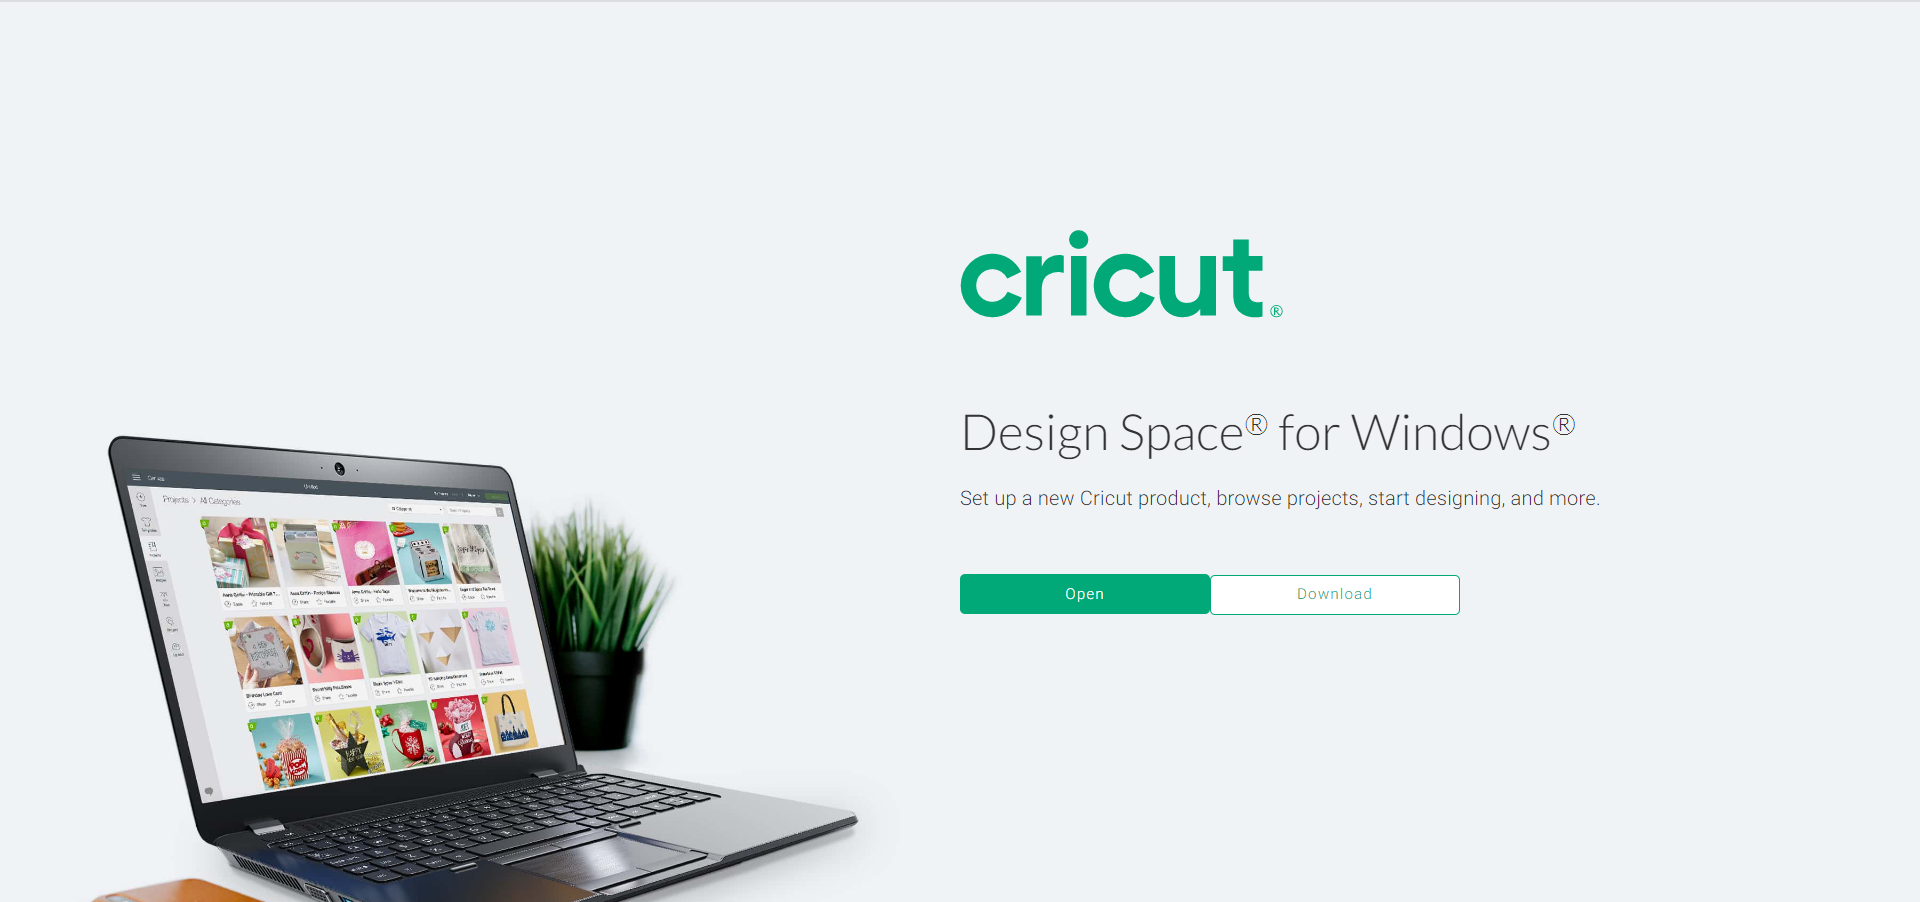
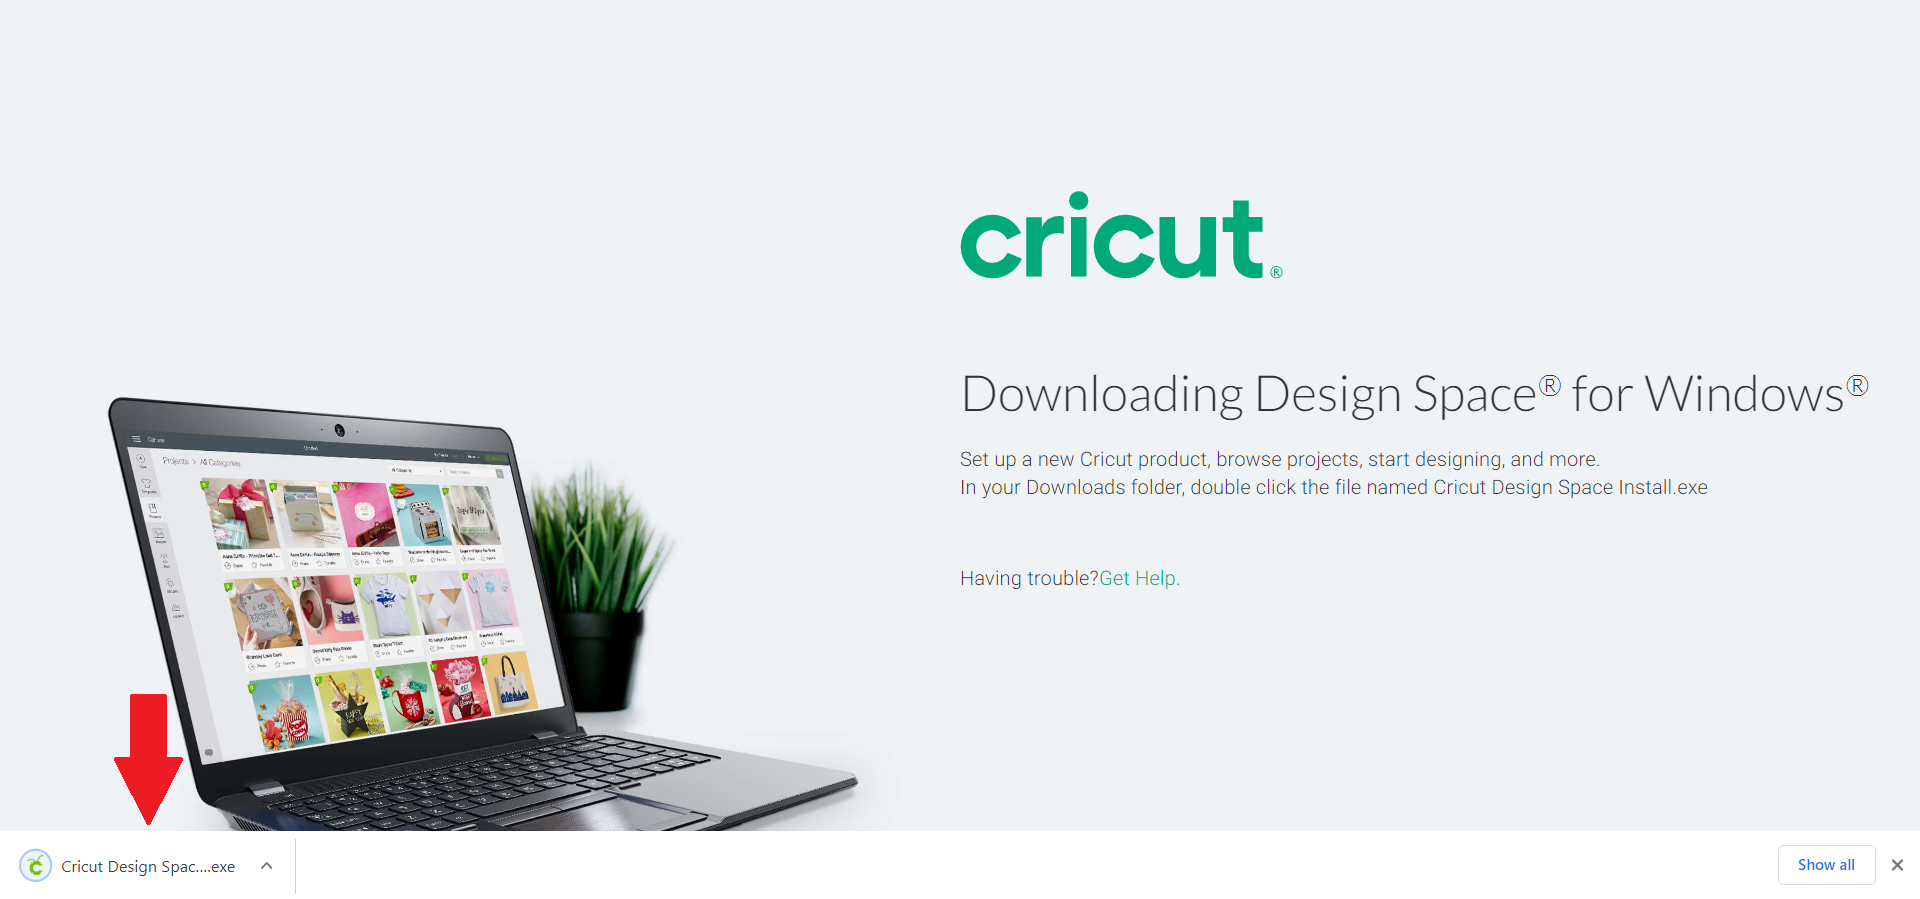
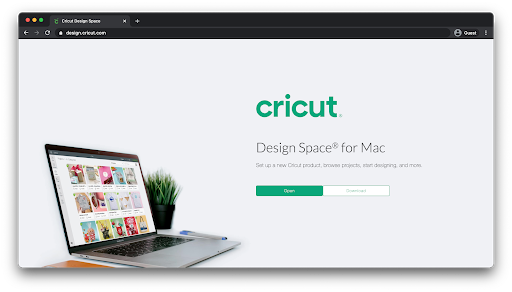
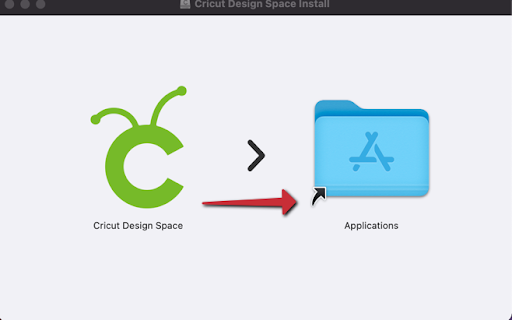
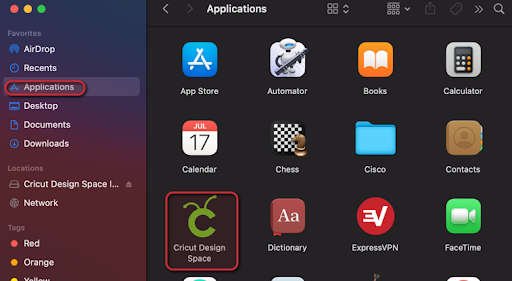
The crafters must upgrade their Cricut Maker & Explore firmware from their Windows/Mac system. Get to know about the necessary steps that the users are supposed to follow during the updating process:

For Maker & Explore

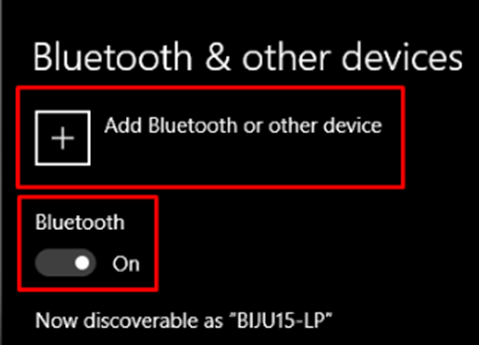
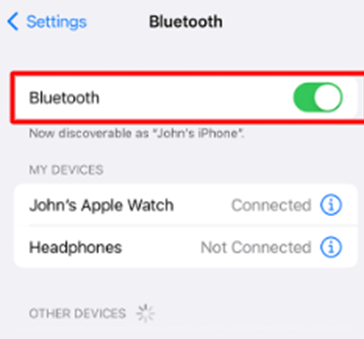
  1. First, you must ensure the cutting machine is powered and connected with a Bluetooth/USB cable.
  2. Second, you’ll receive a firmware update alert while proceeding toward the cutting process.
  3. Third, at the small pop-up window, tick Update, and the process will get started.
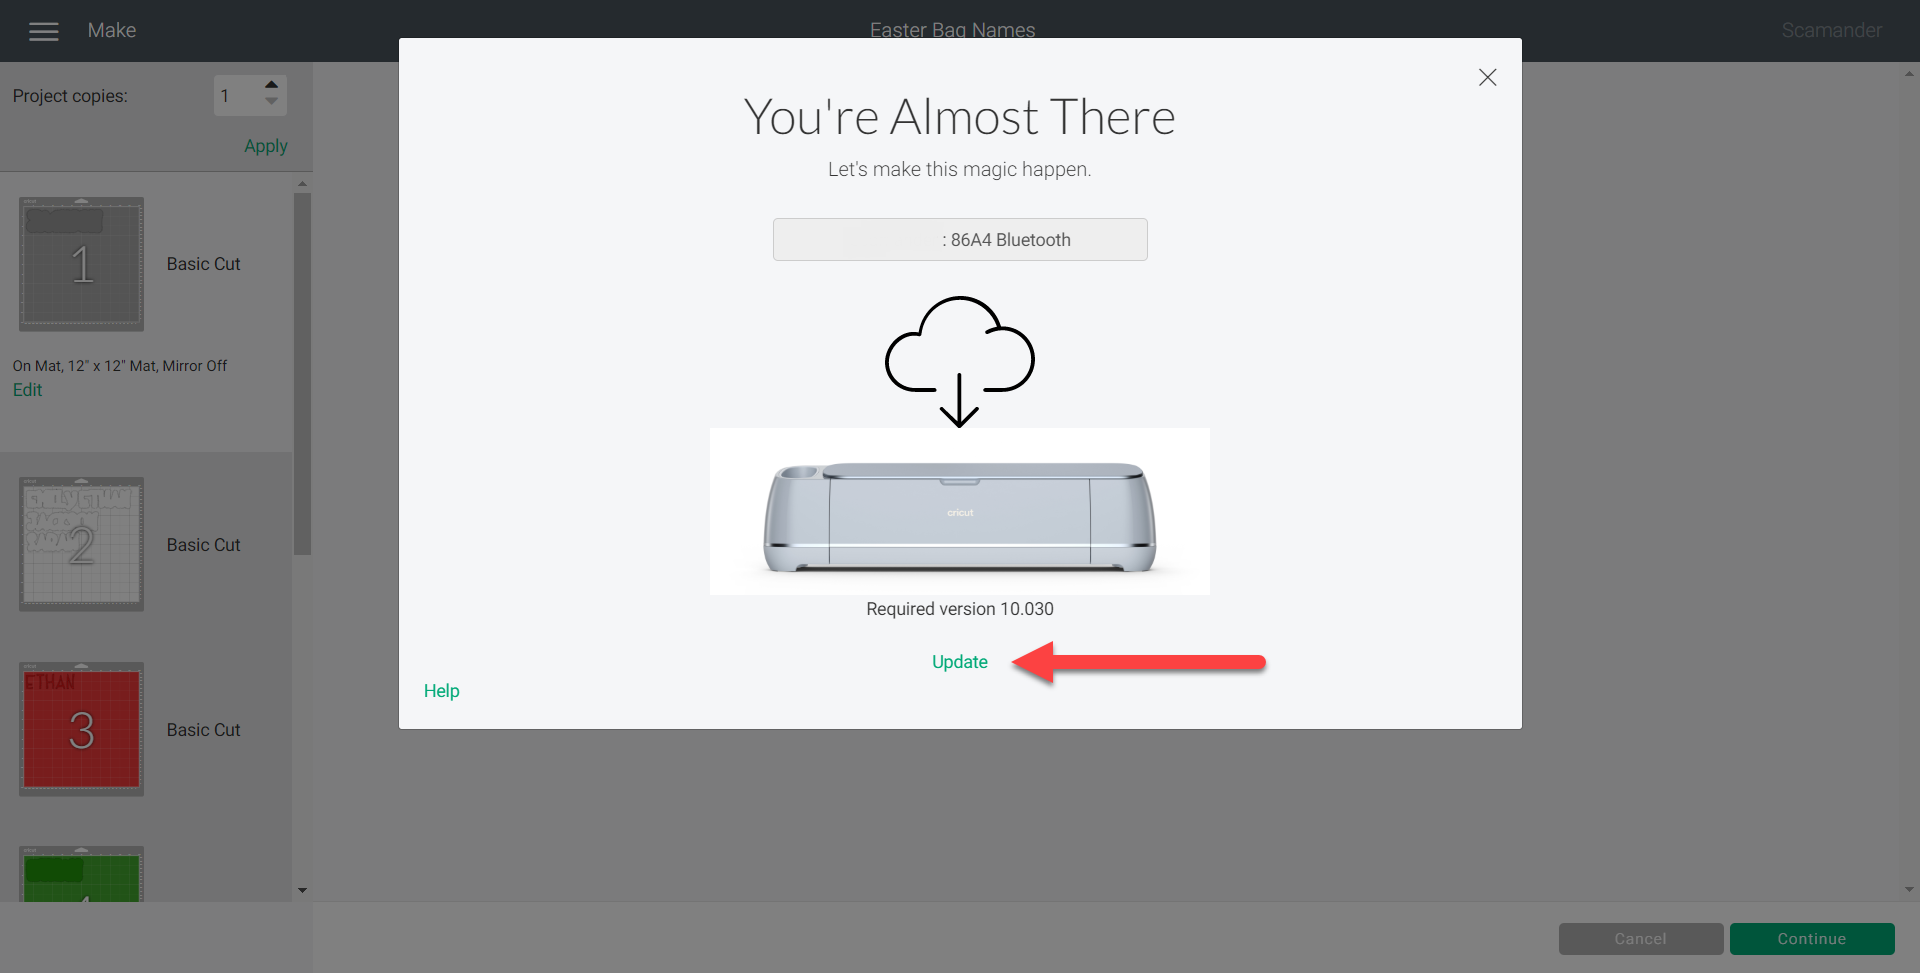
  1. This will make the progress bar visible in front of you. Along with that, the machine’s Power button will turn red.
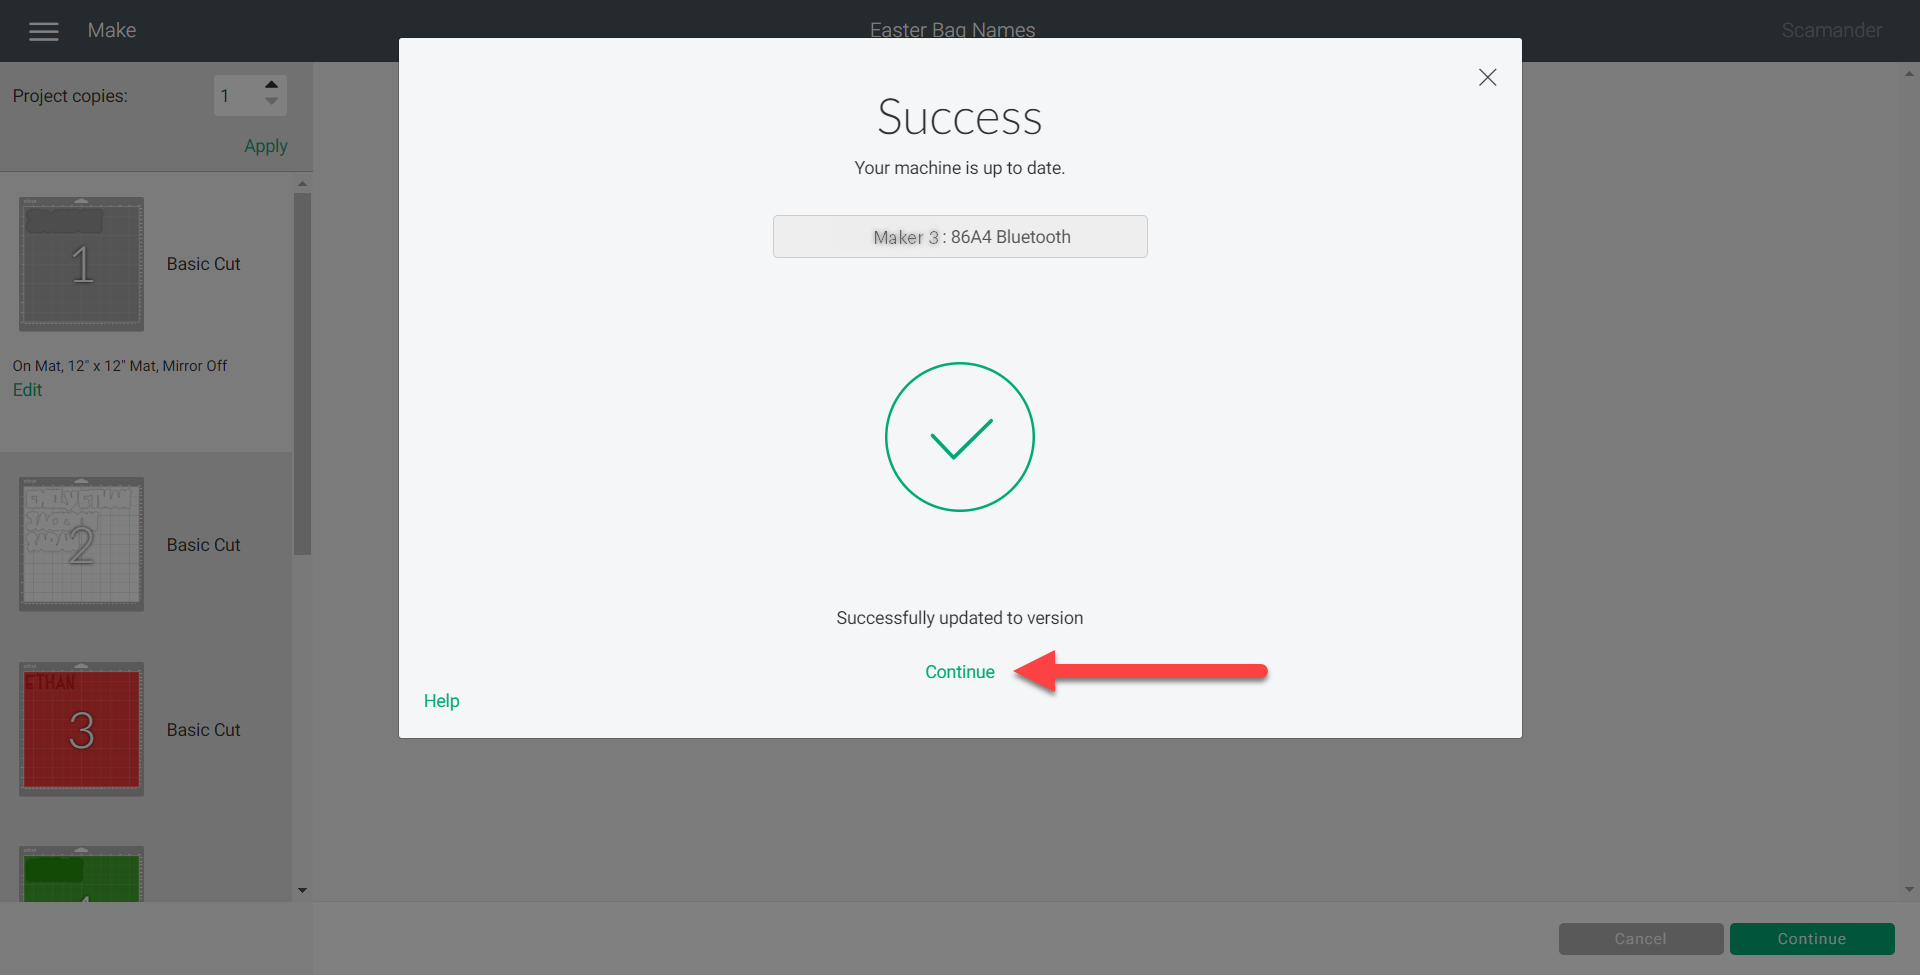
  2. After the update ends, the cutting machine will automatically turn off. In addition, you’ll get a notification about the update being completed successfully.
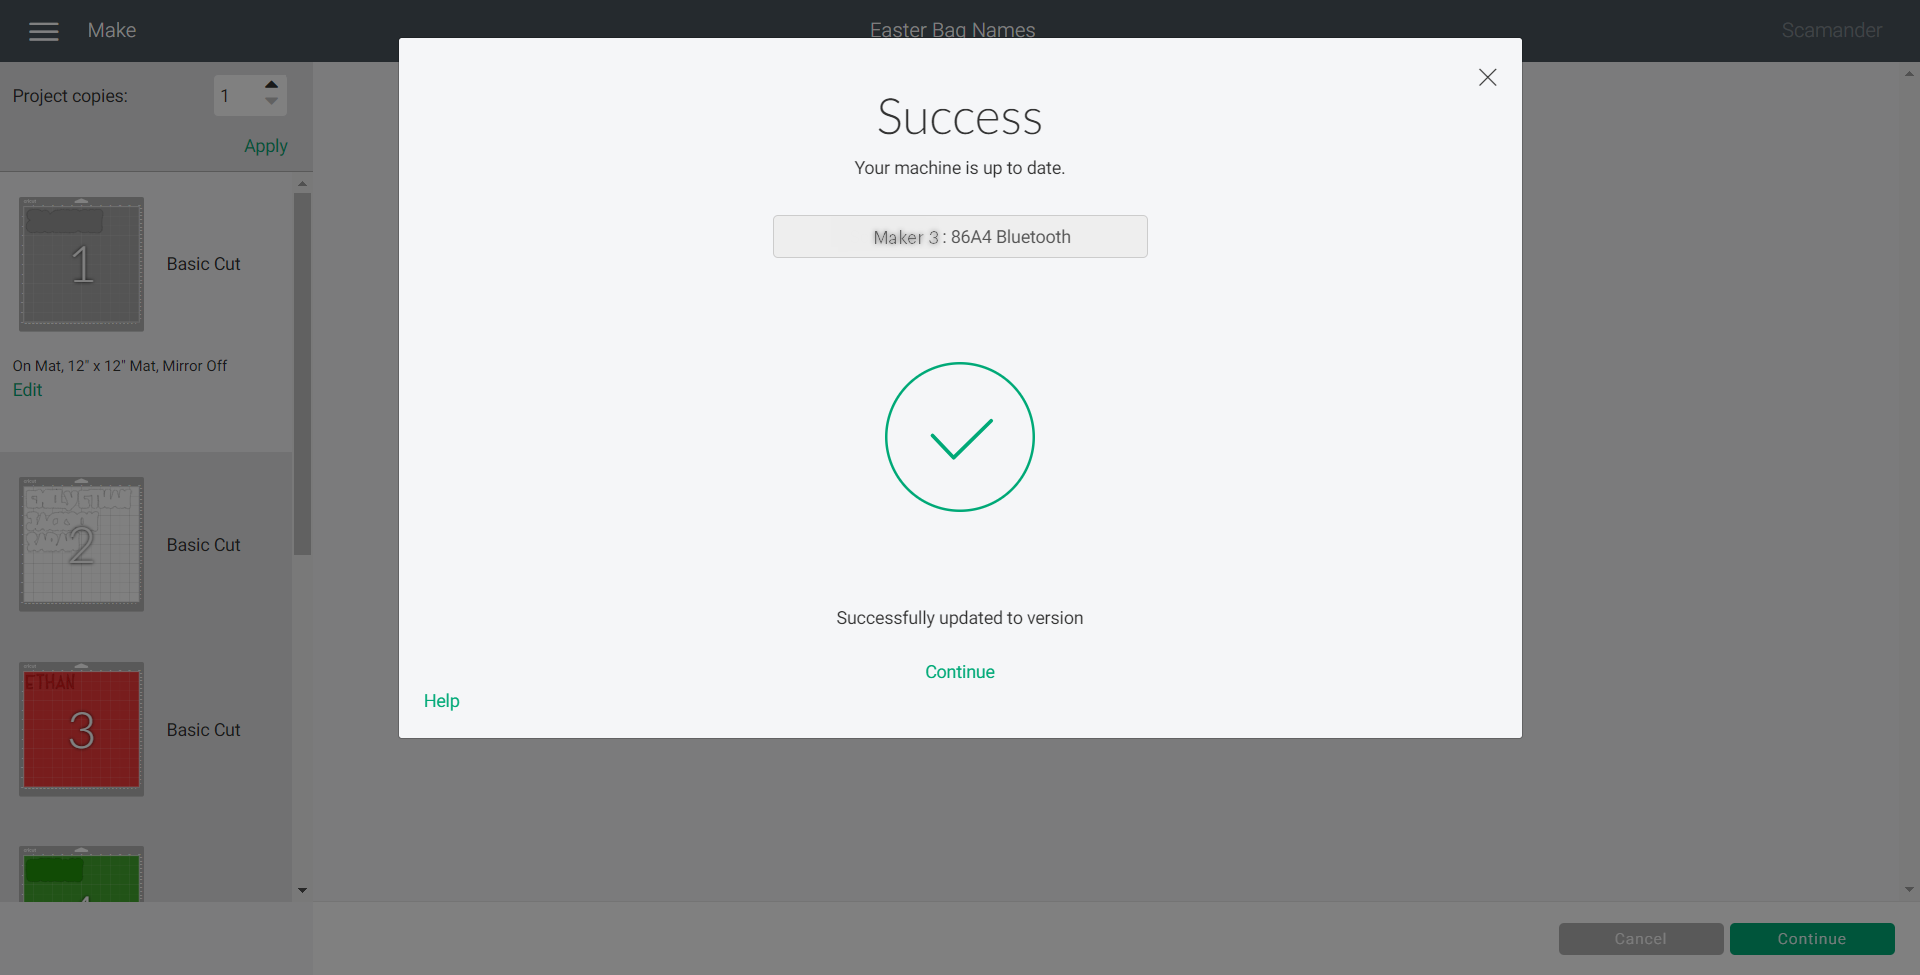
  1. Lastly, tap Continue to resume the craft-cutting process.

Besides upgrading the Maker & Explore series, Cricut Joy model firmware can be updated.

How to Update Cricut Firmware on iOS Devices?

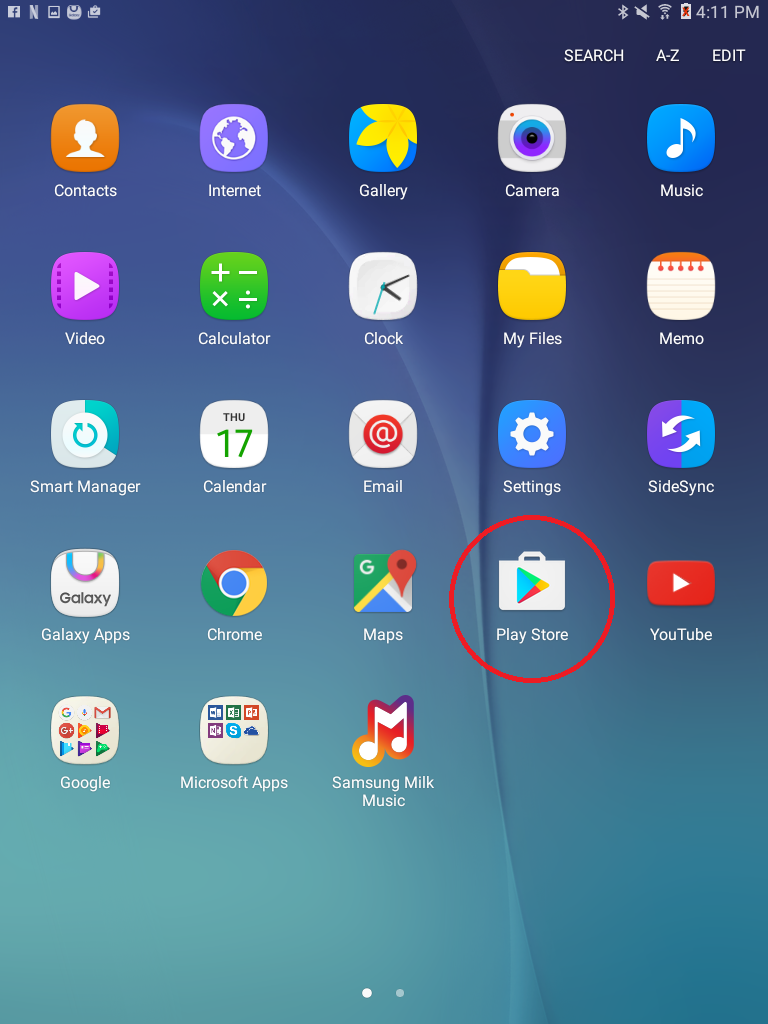
If you are an iOS user and planning to upgrade the software firmware, then pursue the steps needed to be taken to upgrade the Joy model:

For Cricut Joy

  1. In the opening step of the process, cross-check that the Joy machine is switched on and connected to Bluetooth/USB cable.
  2. After that, you’ll get a message about firmware updates (if necessary) during the setup or cutting process.
  3. Following this, click the Update button, and the updated progress chart will be shown before you.
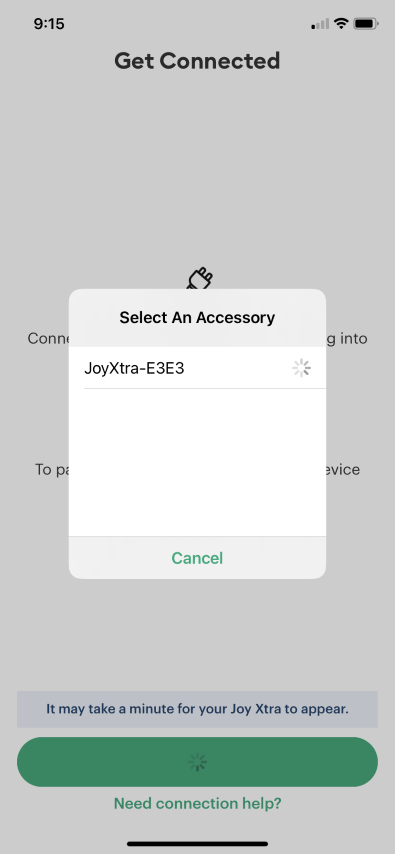
  1. The joy-cutting machine will be rebooted during the update process; choose Reconnect button.
  1. Once the quick machine check gets complete, press Continue to take a step forward in the setup/project-cutting process.

On the contrary, an individual can also upgrade the Cricut Heat Presses firmware for better performance in the forthcoming days.

How to Update Cricut Firmware on EasyPress 3?

Easypress 3 firmware takes place via the Cricut Heat app on Android/iOS devices. However, to complete the process, they’ve to follow the steps explained in the section below:

  1. Begin the process by plugging the respective into the wall outlet.
  2. After that, tick the Power button and turn on the machine.
  3. Followed by the opening of the machine, ensure that the press is paired with your mobile devices.
  4. Next, you must open the application and sign in with the login details.
  5. However, choose your press from the list if the unit is already set up.
  6. After choosing the press, any available firmware will automatically get started.

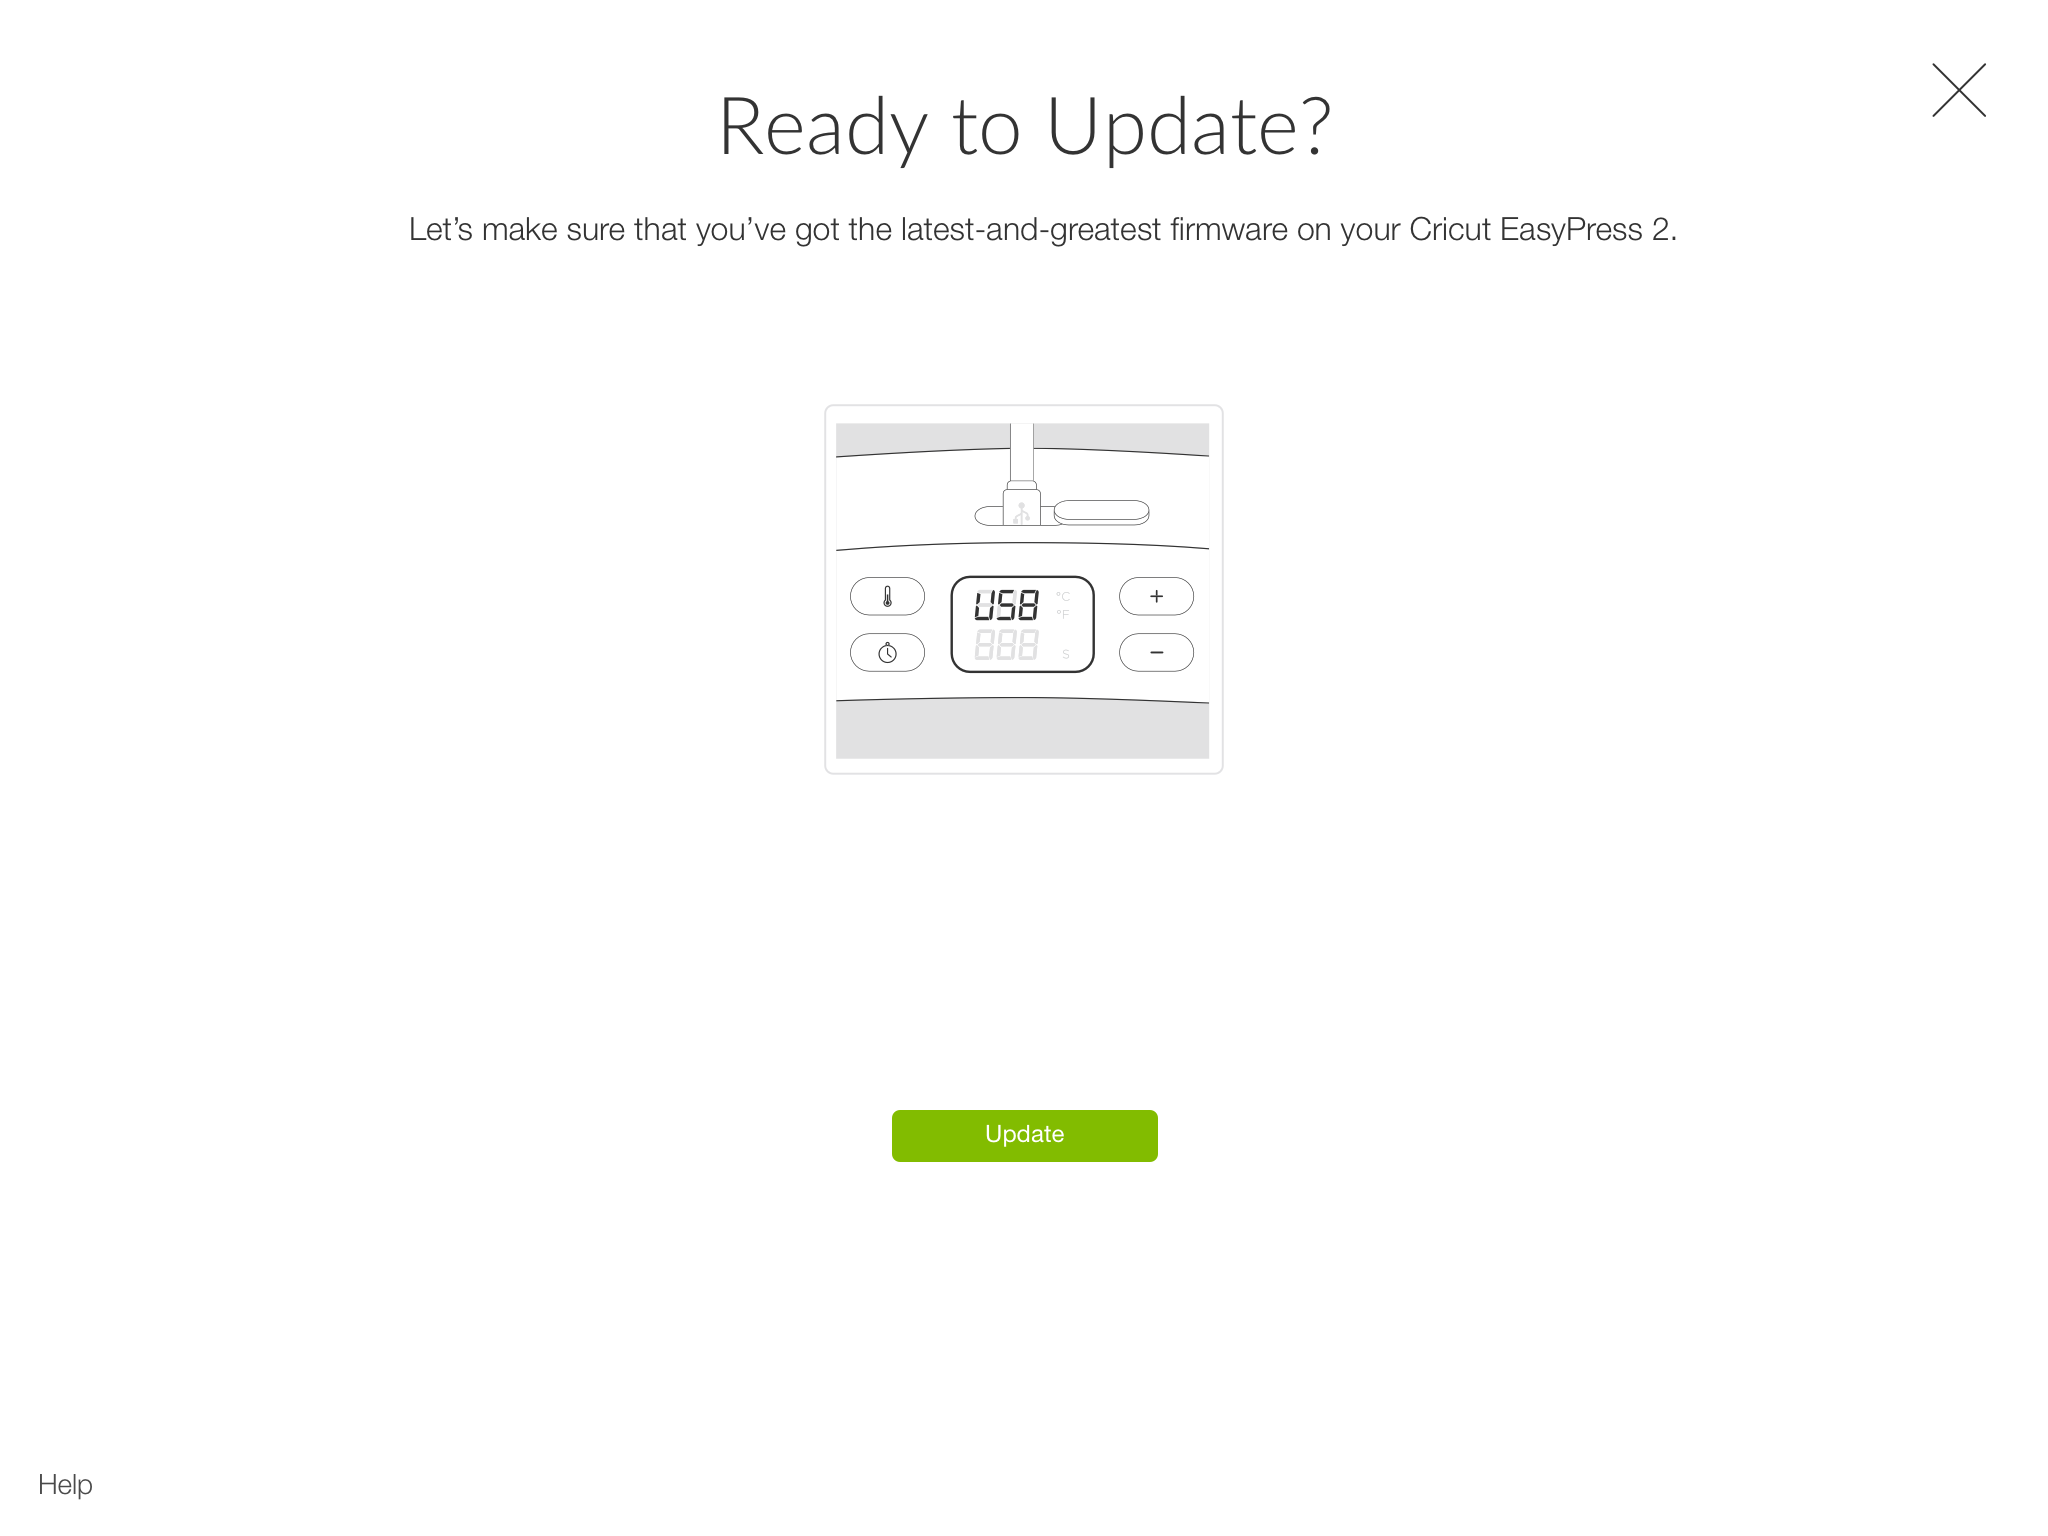
How to Update Cricut Firmware on EasyPress 2?

Follow the steps shared in the coming pointers to learn about the firmware update process:

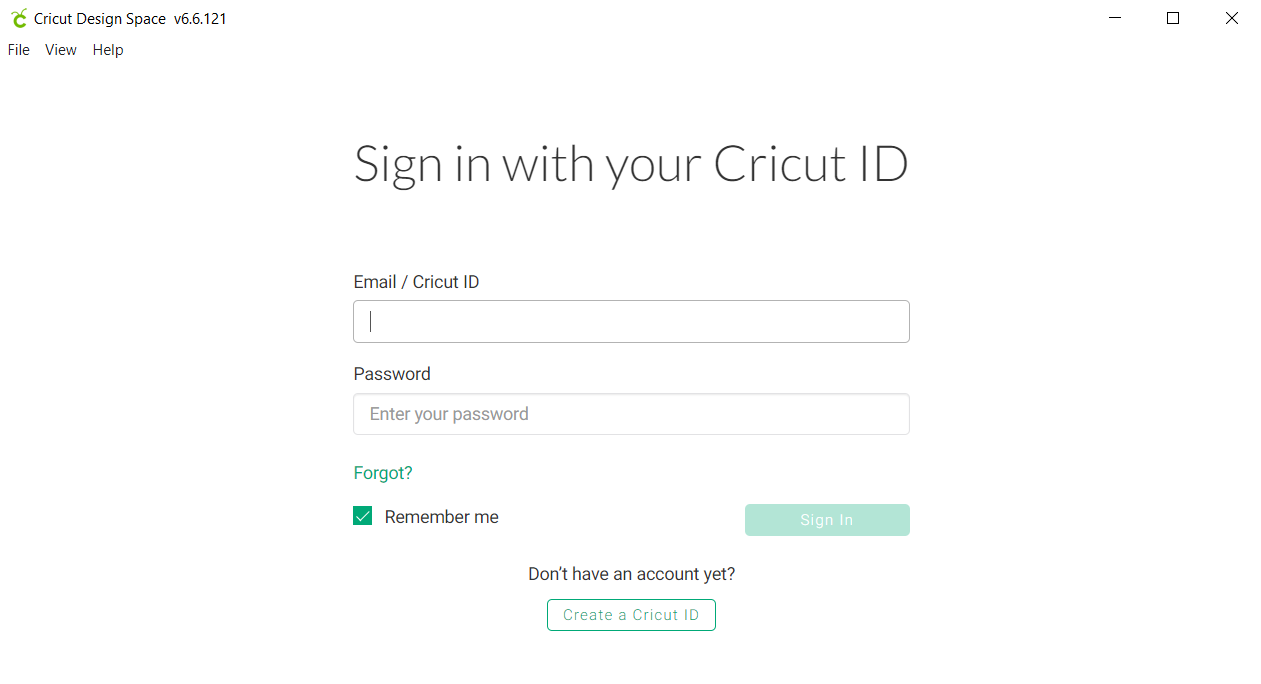
  1. First, install the Cricut app and sign in by entering the asked details.
  2. Second, follow the displayed instructions to complete the connection process.
  3. Third, the software will take a few minutes to scan the available device and will provide the steps for commencing the firmware update process.
  1. Moreover, press the Update button, and your firmware will start beginning.
  1. Next, you’ve to wait until the firmware is updated with the progress bar showing the percentage.
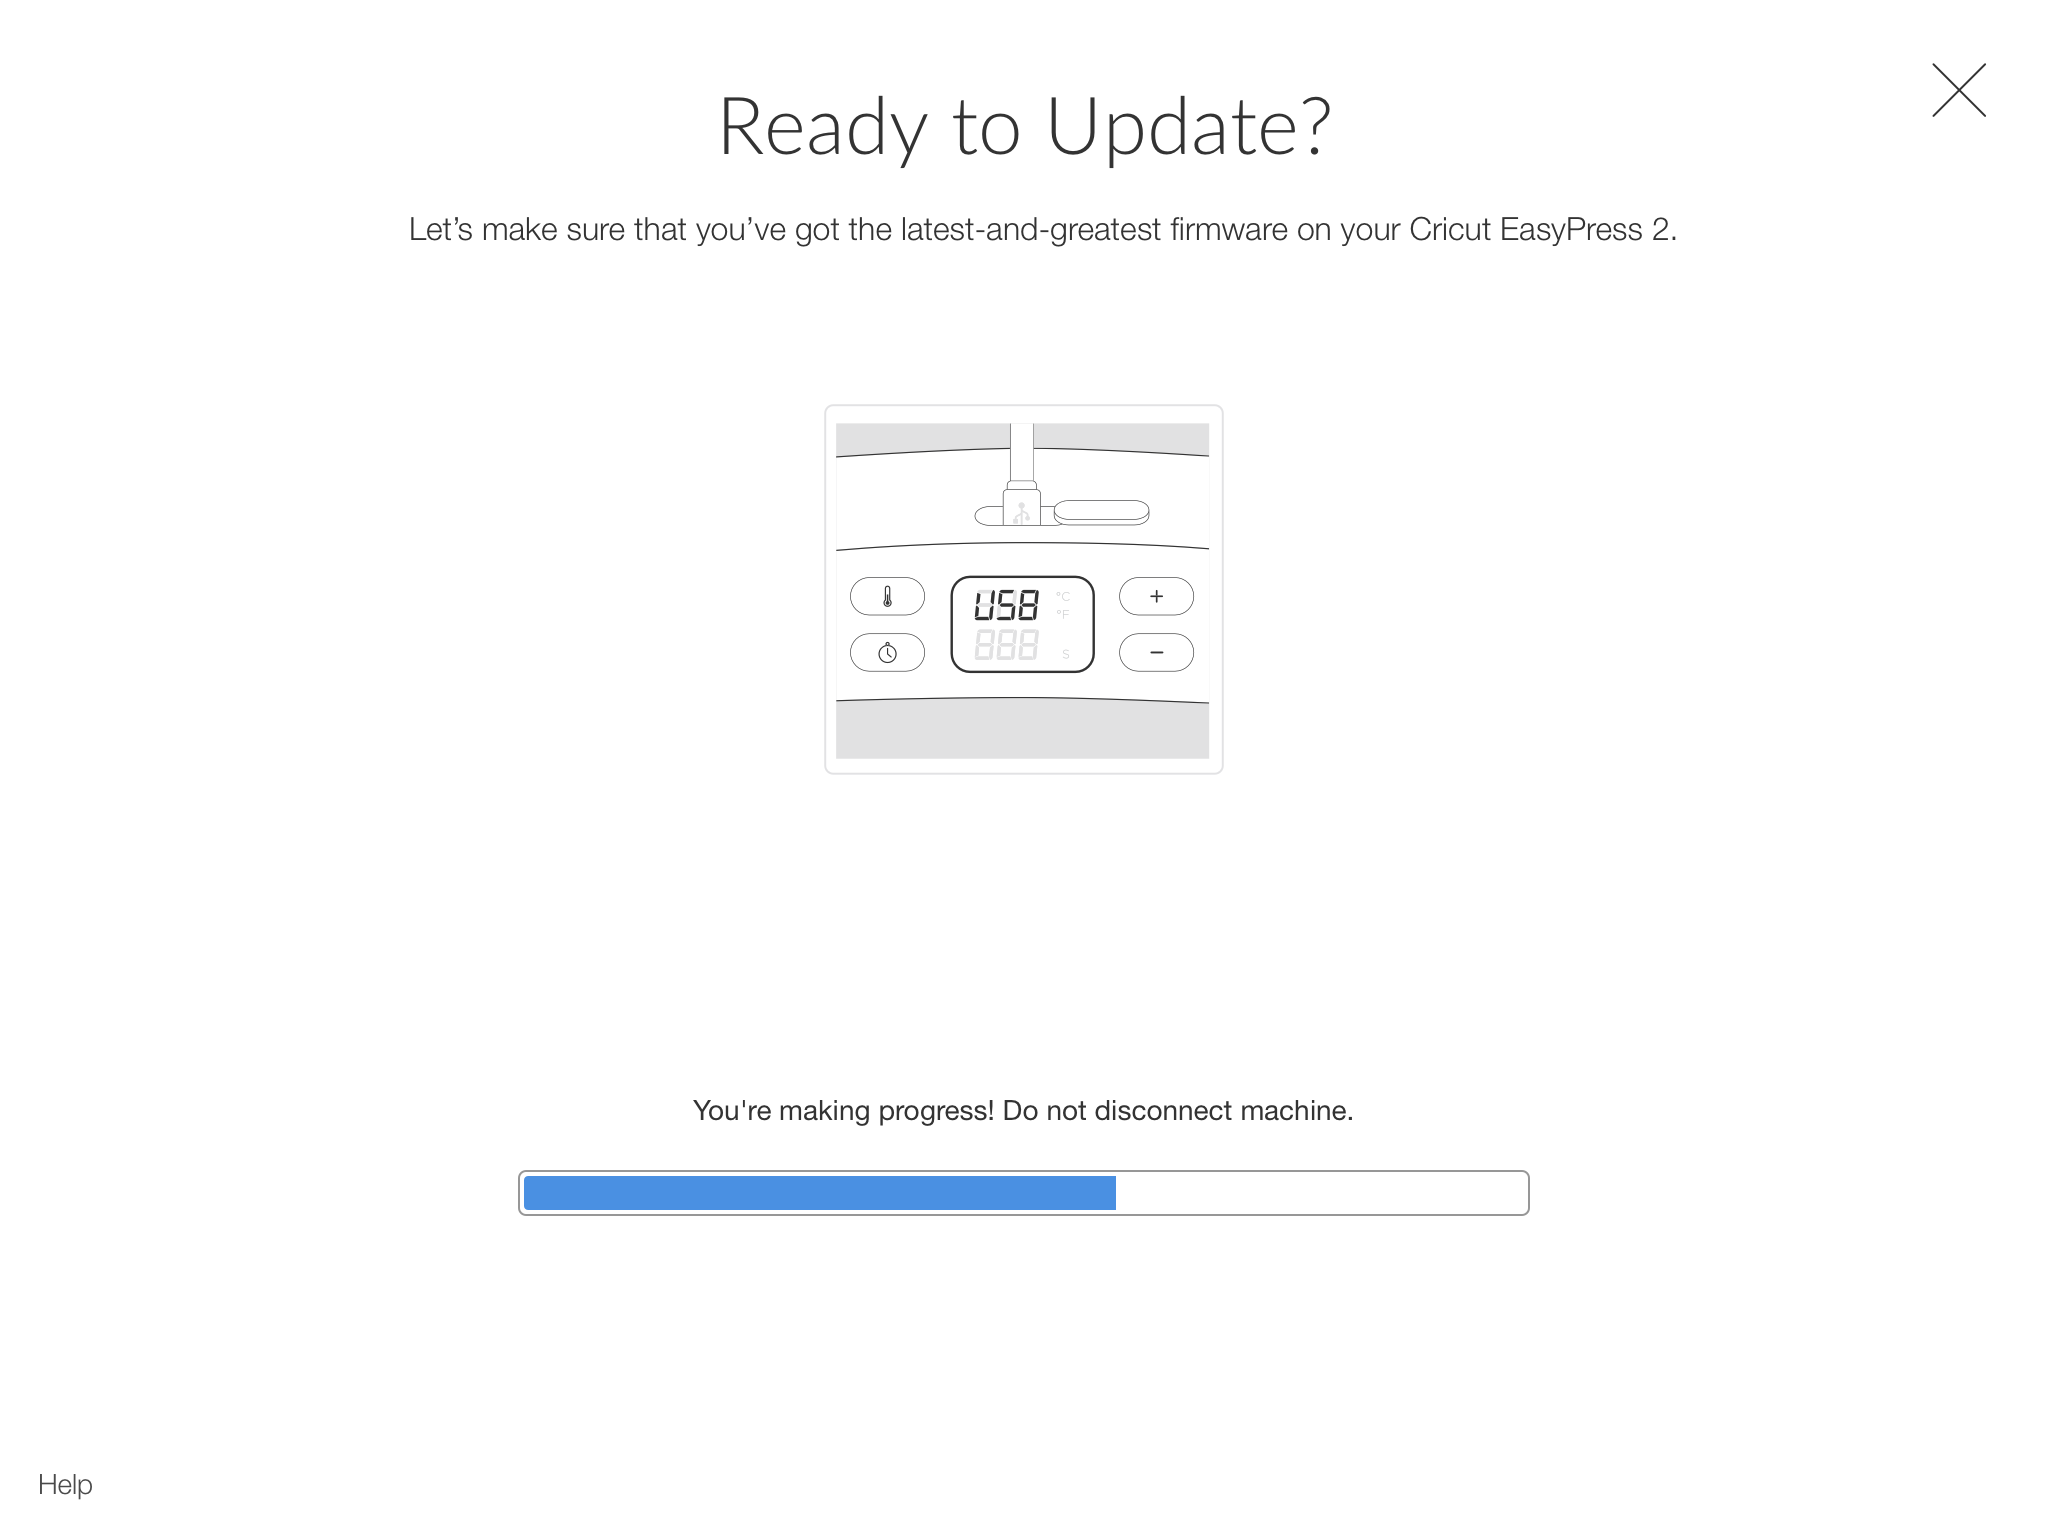
  1. Now, the EasyPress 3 will beep, indicating the completion of the software update process.
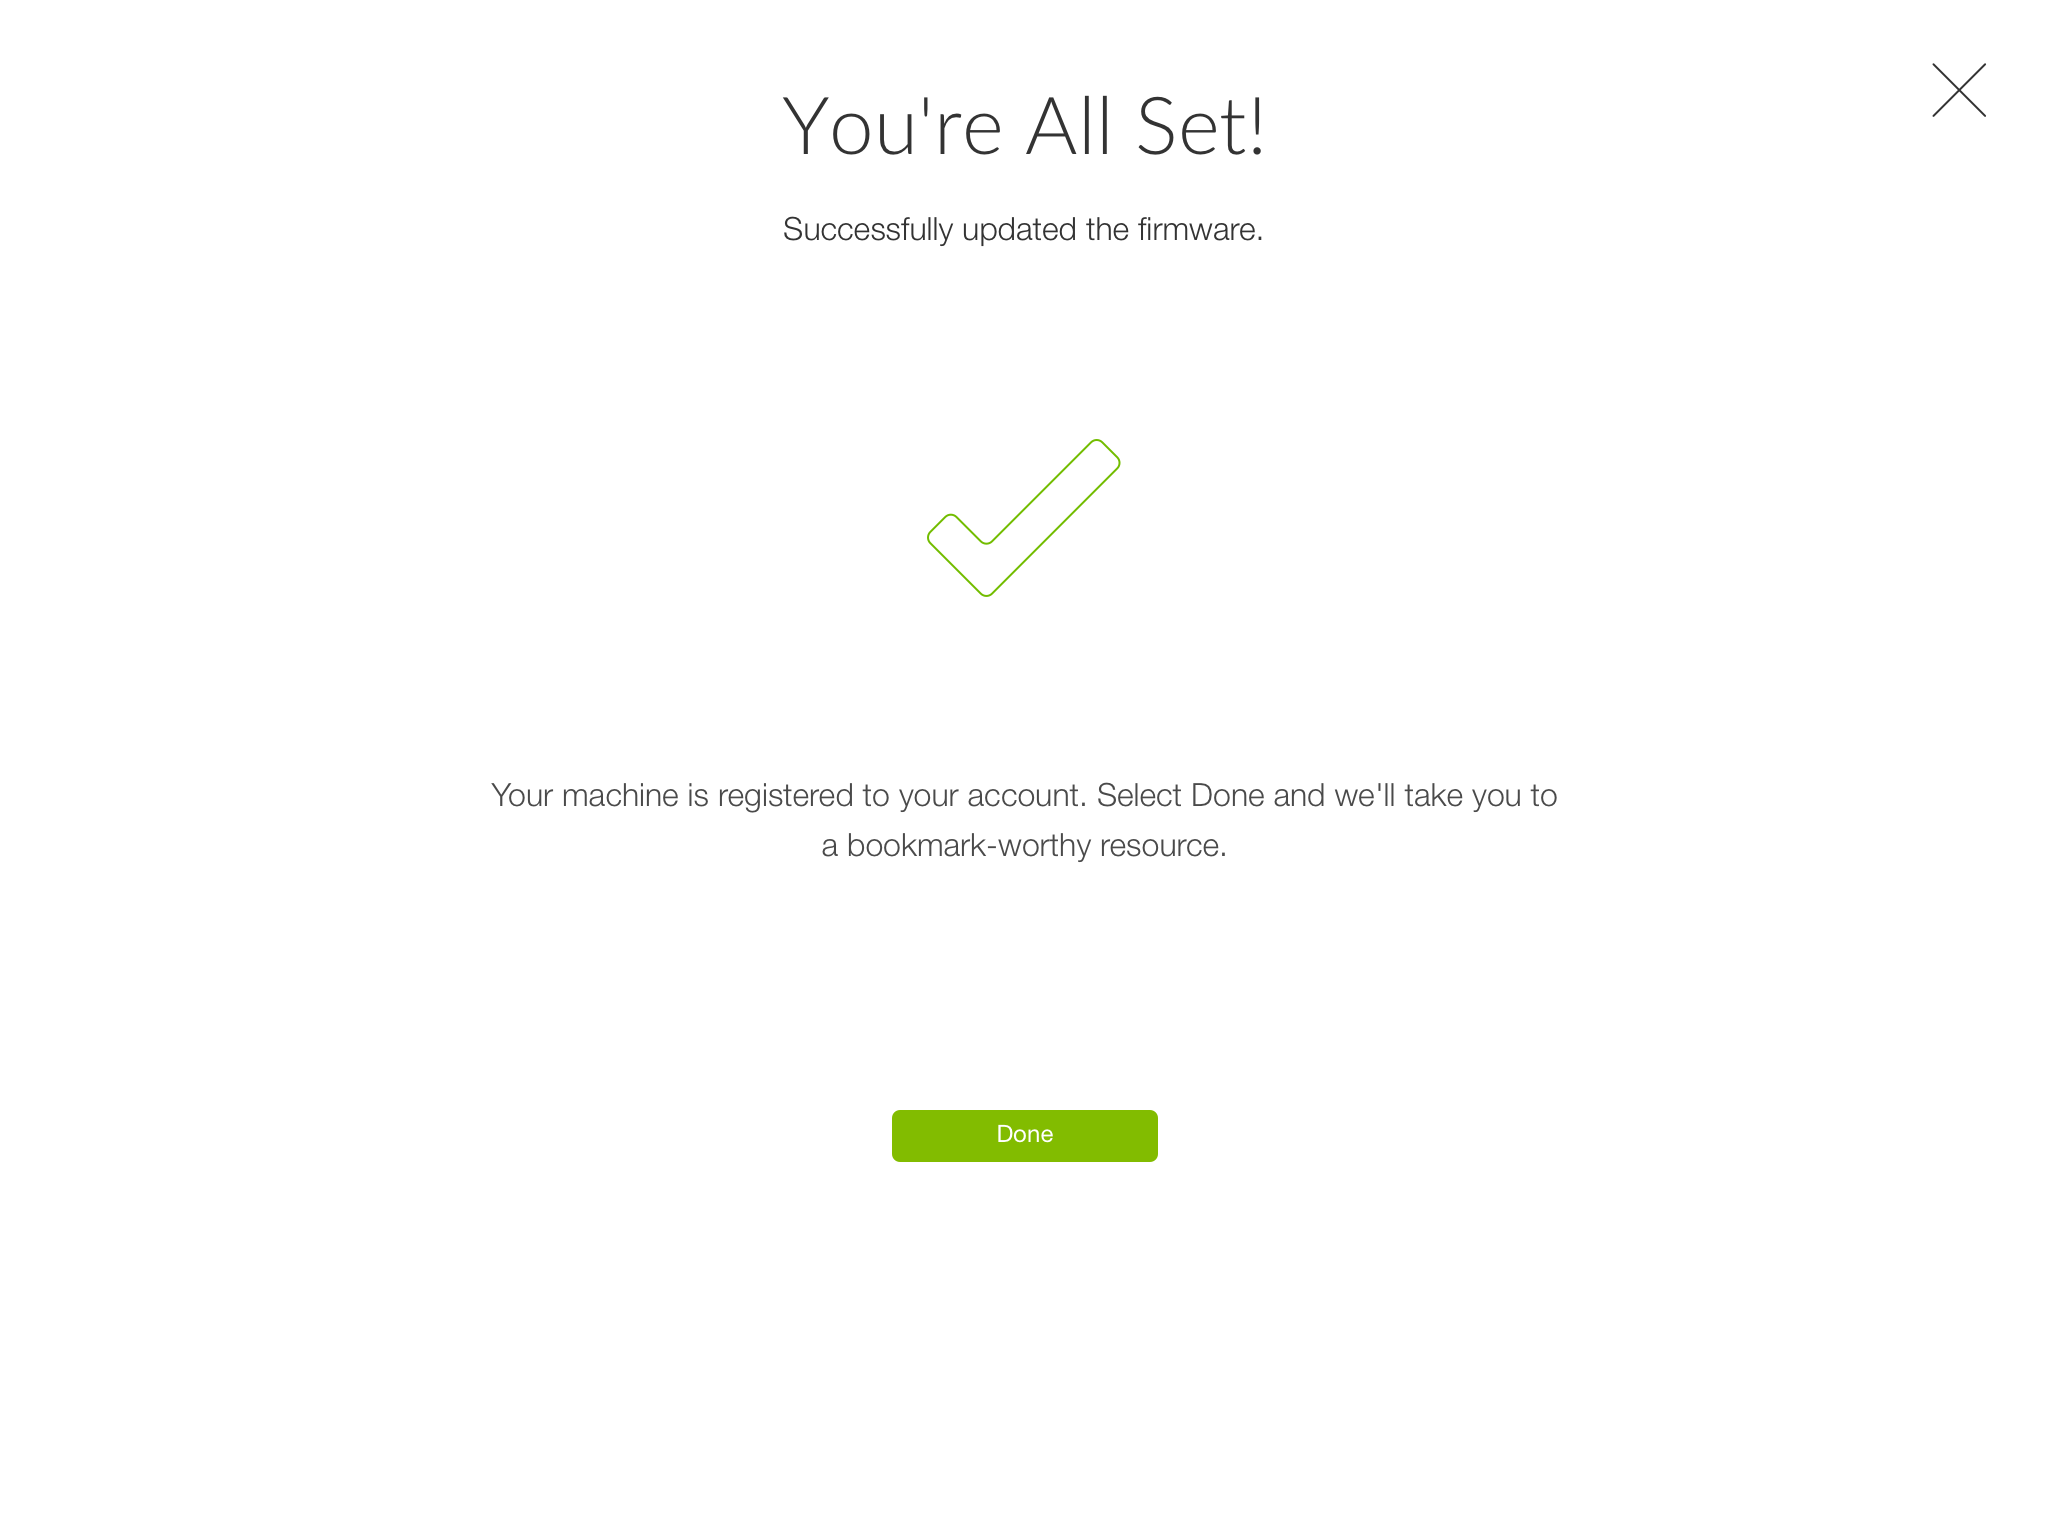
  2. Choose the Done button in the middle of the screen to open the Cricut Heat Guide. However, you can also select the X icon on the top right side of the screen.

DIYers must know about the firmware process to get the latest updates from the craft plotters cutting machines and heat presses.

Frequently Asked Questions

Question: How to Update Hat Press Cricut Firmware?

Answer: Follow the steps to learn about the Cricut Hat Press firmware process via the Heat app:

  1. Take the unit and plug it into the compatible wall socket.
  2. To power the machine, press the Temperature button.
  3. Next, cross-check whether the Hat press is paired up with your smartphone.
  4. Now, open the Heat app and sign in via credentials.
  5. Choose the Hat press if you’ve already set it up, and the update will automatically get started.

Question: How to Update Mug Press Firmware?

Answer: Complete the firmware process with the help of the steps given below:

  1. Put the Mug press into connecting mode after plugging in the power cord.
  2. Open the designing software on the Desktop and sign in to your account.
  3. Under the Heat Press menu, choose Mug Press and read the on-screen instructions.
  4. After the press gets detected, the firmware update will commence.
  5. Following the end of the firmware update, disconnect the USB cable from the press.

Question: How Can I Solve the Issue of Losing Power During an Update?

Answer: Read the steps to complete the firmware update process without any technical issues:

  1. Start the process by opening the Cricut app and logging in to your account.
  2. Tick Update Firmware from the upper left Menu bar.
  3. Connect your Desktop with a USB cable and press Update in the firmware update window to solve the issue.

Visit – Cricut.com/setup
design.cricut.com
www.cricut.com/setup
Cricut.com sign in
design.cricut.com/setup

How to Perform Cricut Setup Download on a PC and Phone?

 If you think of setting up a new Cricut machine, sometimes it is a little tough, but it can also be intimidating if you want to know the full steps of the Cricut setup download. We’re here to briefly introduce you to how you can download the Cricut Design Space. Cricut Design is free online software for Cricut machines, and here, users can select the image cut by their device and their own design images. To use your machine, you need to download the Cricut Design Space. The Cricut app is both free to download and use on iOS and Android.

Cricut Setup Download on Windows Computers

If you want to download, install and launch the Cricut Design for your Windows computer, you can follow these steps for Cricut download:

  1. Open your internet browser and search for Cricut’s official website.

  1. Choose the option of download. In the process of downloading, the screen will change. It can be different with every browser. The example is of Google Chrome in the picture below.

  1. After completing the download, double-click on the File in the browser or the download folder.
  2. The setup Windows shows you the process of installation.
  3. Sign in with your Cricut ID and password.

  1. The Cricut Design will open, and now, you can start working to create your projects.

Cricut Setup Download on iOS Devices

Cricut Design Space can be used on your compatible iOS device as an app with the internet browser to your devices. To download the Design Space on an iOS device, use the official link.

And to install it, follow these steps:

  1. Firstly go through the App Store icon on your iOS device.

  1. Type Cricut Design Space and search for it. The app appears in a white box with a green C icon in the center of the box.

  1. Click on to Get the button to install the app; after downloading, verify it with your iTunes ID  password if prompted to enter it.
  2. Once the download is done, the app will launch and show you the option to setup the New Machine.

  1. After all, sing in it, and start working on the go.

Cricut Setup Download Android Devices

Cricut Design Space can be used on your compatible Android device as an app with the internet browser to your devices. To download the Design Space on Android devices, use the official link.

Follow the steps below to install Cricut on Android:

  1. Click on the Google Play Store icon on your Android device’s home screen to go to the Play Store.

  1. Type Cricut Design Space and search for it. The app appears in a white box with a green C icon in the center of the box.
  2. Click on the Install and download the app on your device.

  1. After completing the installation, the app will appear on your home screen.
  2. Tap the icon to open the app, then sign in and start working on the go.

Conclusion

Learning about Cricut download and the steps of setting it up. Cricut Design for Beginners can be a joyful and great experience. If you’re new to installing the Cricut Design on your devices, you can follow given these easy steps. Cricut Design Space is a great graphics editor fully compatible with your Windows. Installing the Cricut Design is a simple process; users can easily download it after installation. After the Cricut setup download, users can easily use the program and create their projects with the features of Cricut.

Frequently Asked Question

Question 1: What are the steps for Cricut Download on iOS?

Answer: Follow the steps to install the Cricut setup on iOS:

  1. Open the app store, then search for Cricut Design Space.
  2. Click Get to install the app, then verify it with your iTone ID Password.
  3. Once the download is done, the app will launch and show you the option to setup the New Machine.
  4. After all, sign in with your Cricut account, and start working on the go.

Question 2: How can I easily setup the Cricut Design Space?

Answer: To setup the Cricut software on your device:

  1. Go to the official website of the Cricut on your browser.
  2. Download and install the app for your system.
  3. Follow the on-screen steps to sign in, and if you don’t have Cricut’s ID, create an account to get Cricut ID and set up your new machine.

The setup is complete, and you can use it to start working on your projects.

Question 3: How to Cricut Setup Download on Android?

Answer: Follow the steps to install the Cricut setup on Android:

  1. Go through the Google Play Store icon on your device.
  2. Then, write Design Space and search for it.
  3. Click the Install button to download and install the app on your device.
  4. After the installation, the app will appear on your home screen.
  5. Tap the icon to open the app, then sign in and start working on the go.

Visit – design.cricut.com/setup

Cricut.com setup windows

Cricut.com design space

Cricut.com/setup

www.cricut.com/setup

Source URL: – Cricut setup download

What Are The Various Types Of Cricut Replacement Parts?

The Cricut machine allows users to design and cut unique craft projects, but to put everything in the best way, you should keep all the tools and elements perfectly. Follow this guide if they want to know the Cricut Replacement Parts or if they need to know about accessing other parts of the device which need the door to be removed.

Even though The Cricut machines last for a reasonable amount of time, some parts of the Cricut Machine may need to be replaced due to the machine’s lifetime. The range of Cricut Replacement Parts can be blades, cutting mats, AU power cords, and many others. Cricut Machine replacement items require you to put your machine in working condition to its optimum performance.

Various Types of Cricut Replacement Parts

Using the machine, you can cut the materials easily and print your designs on any products, such as mugs, t-shirts, and many more. Whether you’re working with fabrics, woods, metal, or ceramics, the cutting and heat pressing machine provides consistent, quality results. The Cricut machine is clear and fast when it gets proper care, and then, it makes it easy to create multiple and large projects in a short period.

There is also all of the ecosystem of accessories and tech that comes with Cricut. If your Cricut machine fails, you can find all the Cricut replacement parts you want. But most often, it is blades and cutting mats. The material with which you’re working, the frequency of use, and care will determine how much time the blade will last.

Steps to Cricut Replacement Parts As Maker Lid

To remove the cover from the connecting joints, then use an iFixit opening tool, and pry to the perimeter of the cover to release it.

●     Some items are holding the cover, so prying it off could take some time and finesse.

●     Remove the cover from the connecting joint and set it on the other side.

●     Remove the four, 10 mm Torx TR8 security screws holding the lid in place.

●     The device should now be facing you from the rear.

●     On the device’s rear, look for the tiny rectangles. In between each pair of rectangles, there is a cylindrical connector.

●     Put one or two iFixit opening picks in the seam where the Top Door meets the device, then pry upwards along the seam with the iFixit opening tool.

●     These steps ought to make the cylindrical connectors visible.

●     Press down on the lid

●     Push the lid to outwards free it from the joined clasps

Cricut Replacement Parts as Front Door

●     Use your hand or an open tool to remove the four-foot pads covering four screws.

●     Use a Philips #1 screwdriver to remove four 41 mm screws from the feet.

●     Remove all seven screws (Four 8.5 mm screws and three 12.5 mm screws) at the bottom of the device, this will permit you to remove the cover later on.

●     Using a Phillips #1 screwdriver to remove the four 8.5 mm screws from the bottom of the device.

●     Use a Phillips #0 screwdriver to remove the three 12.5 mm screws.

●     Use a Phillips #1 screwdriver to remove four or 10 mm screws on the side of device.

●     Use a Phillips #1 screwdriver to remove the two 22 mm screws.

●     Unplug the connector bundle from the motor on each side of the machine. To avoid damages, coax the connector out of the socket gently using a spudger.

●     Remove a total of seven 10 mm screws from the underside of the door.

●     One side of the base has two 10 mm screws.

●     Other side of the base has five 10 mm screws.


Conclusion

Learning about Cricut Replacement parts and the steps of replacing the part of Cricut Design Space for Beginners can be a joyful and great experience. If you have Cricut Design space in your home and sometimes the parts of Cricut need replacement and repair, maintain Cricut Design Space. Replacing the Cricut Design Space is a simple process, and users can easily replace it, and if they’re not able to replace it, they can contact the professionals of Cricut. Cricut Replacement parts users can easily use the program.

Frequently Asked Questions (FAQs)

Question 1: What is Cricut Design Space?

Answer: Cricut Design Space is a free design software. In this, users can create, customize, and cut projects with their own images, fonts and design. The program can work with all the Cricut Machines and offers an array of features to make creating projects easy and fast.

Question 2: Are Cricut Parts Replaceable?

Answer: Yes, Cricut parts are replaceable, and if users have the knowledge to replace the part of Cricut so, they can easily replace the parts. But some users do not know how to replace the parts of Cricut that are actually new to the Cricut Design Space. They can take help from professionals at Cricut to change the parts of it. And yes, Cricut Replacement parts of it.

Question 3: What parts of Cricut can be replaced?

Answer: There are many parts in Cricut that can be replaced. Mostly all of the parts can be replaced and can be repaired, such as “Front Door, Maker lid” and many more.

Visit – design.cricut.com/setup

Cricut.com setup windows

Cricut.com design space

Cricut.com/setup

www.cricut.com/setup   

5 Must-Have Cricut Maker Machine Accessories for Crafters

Welcome to our guide, where you will learn about some of the top must-have Cricut Maker machine accessories! No doubt, Cricut is the most advanced and smart cutting machine. The machines have ample crafting features that make things perfect and easier for a crafter. But, in order to use the machine, there are various supplies and tools necessary to have. Therefore, keep reading the blog till the end to learn what tools you should have if you are a user of Cricut Maker or any other cutting machine.

1.  Cricut Basic Tool Set

Every crafter must have this basic tool if the crafter wants to step into the field of DIY project-making. In this toolset, you get a spatula, scraper, weeder, scissors, and tweezers. With the help of these Cricut basic tools, you can handle the craft and DIY project perfectly.

Additionally, they help in getting the flawless result in finishing the project after cutting with much.

Apart from that, this tool kit can be beneficial for crafters even if they are not using a Cricut Maker machine. You can include this in your Cricut Maker machine accessories list before buying the machine.

2.  Dust Cover for Cricut Maker

The safety of your Cricut Maker is also important if crafters want to keep using your machine for years. Also, it can get scratched, stained, and dust on it if stored openly all the time. Thus, having a dust cover is one of the most Cricut Maker machine accessories every owner should have.

These dust covers are water and dust-proof that promise the complete security of your machine. Apart from that, some covers come with multiple pockets that help you need all essential tools in one place.

3.  Cricut StandardGrip Machine Mats

How can you forget a Cricut StandardGrip Mat if you own a Cricut Maker machine? This mat is beneficial to use for your projects when you are working with vinyl, cardstock, iron-on, and many other materials. With the help of this Cricut mat, you can cut your projects more precisely and get perfect results.

Additionally, this mat is compatible with many other Cricut cutting machines. Also, having a mat is a must if you are cutting long projects or making stickers with the machine. So, don’t forget to get this mat for yourself if you have a Cricut cutting machine.

4.  Cricut Engraving Tip With QuickSwap Housing

It is a must to include the Cricut Engraving Tip with QuickSwap Housing in your Cricut Maker machine accessories. As the Maker machine can engrave on various materials, it is vital to have a spare Cricut Engraving Tip. With the help of this engrave blade, you can easily inscribe amazing designs on wood, glass, leather, metal, and many other different materials.

This engraving tip is made of premium carbide steel that gives a permanent design without making any mistakes. You don’t know where you have to do engraving for your project and change the blades hence having an extra Cricut Engraving Tip is also very important for Cricut users.

5.  Cricut Ultimate Fine Point Pen

Most projects involve drawing and writing, so having Cricut Ultimate Fine Point Pen is a must for making birthday cards, greeting cards, labels, cake toppings, invitations, and many others. Also, it comes in the back of premium quality pens that include a variety of vibrant colors. These pens are capable of giving superb results and drawing stunning shapes and works.

Frequently Asked Questions

What tools do I need with Cricut Maker?

Here are some basic tools to include in your Cricut Maker machine accessories.

  • Spatula
  • Tweezers
  • Snips
  • Scraper
  • Weeder
  • Scissors
  • Cricut Mat
  • Cricut Design Space App
  • Cricut Maker Machine
  • Cricut EasyPress Machine, and others.

Can I create projects on the Cricut Maker without using any tools?

No, it is not possible to create any project just by only the Cricut Maker machine. You will be unable to finish your projects if you do not have essential tools. So, you can get various essential tools from the Cricut website or any other online website. Also, the best way is to buy the Cricut Maker bundle so you get all the essential tools required with your machine.

Are Cricut Maker tools expensive to buy?

If you think all the Cricut Maker machine accessories are costly, then you are wrong. There are various Cricut tools that come in just a few bucks. At the same time, some materials and supplies cost a lot. However, you can save a lot of money buying a Cricut Maker bundle because they come at a very reasonable price. Also, there is a difference of less than 100 bucks between the machine and the bundle.

Visit – design.cricut.com
cricut.com/setup
www.cricut.com/setup
Cricut.com/setup mac
Cricut Design Space

Mastering Cricut Mug Design Setup: Step-by-Step Guide

Mastering Cricut Mug Design Setup

Have you ever thought about the Cricut mug design setup process? If so, then meet the Cricut Mug Press machine, which can make hotshot mugs for just about anyone. Users can create customized mugs with 3 easy steps: InsertDesign, and Attach. It becomes easy to get the desired mug from the machine without manual work setting. The innovative infusible ink system delivers seamless, pro-quality transfer that becomes one with the mug, making it last.

However, this machine is made to create unforgettable moments with your loved ones. Apart from this, you can also choose the material bundle of your choice. If you are looking forward to adding a Mug Press machine to your craft room, you should learn how to set it up and other important things.

How to Perform Cricut Mug Press Setup?

Intending to complete the Cricut mug design setup, all the users need to follow the steps in the section here:

Step 1: First, Setup the Machine

  1. First, open the web browser and visit the Cricut Heat Guide home page.
  2. After that, tick the Cricut Mug Press option.
  3. Then, choose the material under the Heat-Transfer Material Base Material section.
  4. Now, press Apply box and proceed toward the preparation method.
  5. Next, the required supplies and preparation instructions will be shared on your screen.

Step 2: Then, Prepare the Surface

  1. Firstly, switch on the Mug Press and let it preheat as per the instructions.
  2. Besides, take a lint roller and clean the mug with easy hands.
  3. Place the design on the mug, leaving at least 0.5 in (1).3 cm from the handle.
  4. Ensure there are no gaps between the design and the mug while wrapping the design around the mug.
  5. Take the heat-resistant tape and secure the edges.
  6. Then, wrap butcher paper over the design and secure it with tape.

Step 3: After that, the Application Mode

  1. Hold the wrapped mug and place it in the preheated mug press.
  2. Now, push down the lever to begin the transferring process.
  3. Next, be sure that the heat plates entirely cover the design.
  4. Once the transfer is complete, lift the lever and use the handle to remove the mug.
  5. Place the mug on the towel and let it cool down for a few minutes.
  6. At last, remove the tape and paper after the mug completely cools down.

Note: Wash your hands with warm water or in a dishwasher. Don’t use steel wool, colored cleansing agents, or scrubbing pads.

Apart from the Cricut mug design setup, you must know how to activate it. Although, you just have to read the section below.

How to Activate Cricut Mug Press?

Follow these stages to learn about the pointers related to the activation of this heat press:

  1. First, open the Cricut setup page and download Design Space on your separate PCs.
  2. Then, sign in by entering the login details, and the welcome page will open.
  3. After that, choose Mug Press under the Heat Press row.
  4. Now, go through the instructions on the screen to connect the press, check the firmware, and complete the activation process.
  5. Here you go, all set to create your first custom mug.

Besides activating the press, finding out how to use the mug’s design in the Design Space would be the best.

How to Use Mug Designs on Design Space?

Go through the following steps to discover the total steps around using mug press designs on Cricut software.

  1. To find designs specially designed for ceramic beveled and stackable ceramic Mugs, look for Design Space Projects inside the Mug Design Setup drop-box.
  2. After that, choose any one of the options from the Finished Setup row.
  1. Before taking any next steps, cross-check that you’ve selected the correct option as per your choice.
  2. Once the choice is finalized, you won’t get a chance to refresh it.

The user can also update its firmware by using the respective mug designs on the cutting machine software.

How to Update Cricut Mug Press Firmware?

Firmware updates make sure that all the latest and updated feature enhancements are included in the machine. However, to get the benefits of those features, you must complete the process by giving preference to the following steps:

  1. First, you must plug in the Mug Press with the power cord. Then, hold down the turn on button until Connect mode starts.
  2. Next, the Power button will display orange, indicating that the press is in connecting mode. After that, plug in the USB cable.
  3. Then, open Design Space on your PCs and sign in using your Cricut ID & Password.
  4. After that,  choose the Design Space Menu and tap the New Machine Setup.
  5. Following this, tick the Heat Press and then Cricut Mug Press.
  6. Now, read the guidelines to connect the Mug Press with the system.
  7. Afterward, it takes a few minutes to search for your press.
  8. Once the search process is complete, the pop-up window with the update progress bar will be displayed.
  9. When the firmware ends, the power button will quickly turn orange.
  10. Lastly, slowly remove USB from the press, and it will automatically turn off.

You’ll get top-quality results by effortlessly completing the Mug Press firmware update process.

Conclusion

Throughout the article, it can be declared that every user must have complete details about the Cricut mug design setup. With the successful setup of this mug heat press, the user will be able to create the next-level professionally looking mugs and gift them to their loved ones. Besides, learning about the Mug Press activation, setup & firmware update process is very important.

FAQs

Question: How do I Align Designs on Cricut Beveled & Stackable Ceramic Mugs?

Answer: To get flawless transfer results, you need to press the straight area of the mug smoothly and ensure the design is completely flat against the mug surface. Place the design so it stops before the beveled or chiseled edge begins to ignore a blurred transfer result.

Question: How Can I Adjust Cricut Mug Design Temperature?

Answer: Intending to avoid non-invited transfer results, using cooler or warmer settings on Mug Design will greatly help. DIYers prefer Cooler Settingsfor yellowing or over-processing the design. Choose the Warmer Setting to solve the issue that designs aren’t transferring to the bottom corners or lack clean edges near handles.

Question: Do I Have to Take Any Safety Concerns While Using the Mug Press?

Answer: While using the press, you must take precautions as the heat plate will be very hot, and you might get serious burns on your skin. Although, users will also experience odors & vapors associated with heat appliances and the Infusible Ink transfers. Apart from that, use the press in a well-ventilated area to avoid any mishappenings during the process.

Source URL: –  Cricut mug design setup

Visit – design.cricut.com/setup

Cricut.com setup windows

Cricut.com design space

Cricut.com/setup

www.cricut.com/setup

A Quick Guide to Cricut Explore 3 Setup on a PC and Mobile

Want to unleash your creativity with the Cricut Explore 3? This powerful craft-cutting machine opens up a world of possibilities for DIY enthusiasts. In this guide, we’ll walk you through the step-by-step process of connecting the Explore 3 to your PC and mobile device via Bluetooth and USB. Whether you’re a novice or a professional crafter, we’ve got you covered. Discover how to navigate Cricut software (Design Space), explore different types of materials, and bring your ideas to life with precision and ease. Get ready to embark on an exciting crafting journey with the Cricut Explore 3 setup guide.

How to Set Up Cricut Explore 3 on Windows/Mac?

All the users who want to be happy with the services offered by Explore 3 need to set up their electric cutting machine by following the steps:

  1. You must start the procedure by plugging the machine and switching it on with the power button.
  2. Next, connect Explore 3 to your Windows/Mac computers via Bluetooth/USB.
  3. After that, open the search engine and quickly visit the Design Space setup page.
  4. Now, download & install the Cricut-DS app/software to sign in or account creation.
  5. You will need to complete the machine setup process after successful account sign-in or account creation.
  6. At last, do a test cut and complete the setup process.

How to Set Up Cricut Explore 3 on iOS/Android?

In addition to setting up Cricut with your PC, you should follow the steps for setting up the machine with mobile devices. For that, complete the process with the help of the steps available below:

  1. To get started, turn on the machine and plug in the machine.
  2. Then, open your device’s Bluetooth and pair it up with your Android/iOS device.
  3. Next, install the Cricut-DS app from Play Store (for Android) & App Store (for iOS).
  4. After that, fill in the details for account sign-in or create your account.
  5. At the Design Space account, under the Menu section, tick the Machine Setup option.
  6. Now, tap the Cricut Explore 3 and complete the setup process by following the on-screen rules.
  7. Ultimately, you’ll learn that the setup is complete when asked for a test cut.

Further, by setting up this cut-die machine on your PC/Mobile, you can connect it via two mediums, i.e., Bluetooth and USB cable.

How to Connect Cricut Explore 3 to Computer Via Bluetooth?

All the Cricut beginners need to connect their PC (Windows/Mac) with the help of the steps in the following pointers:

For Windows

  1. At the initial stage of the process, make sure the machine is ON and place it within 10-15 feet of the computer range.
  2. Next, choose the Settings icon in the gear symbol and the Devices option at the Start menu.

  1. Open the Bluetooth on the devices page, then click the Add Bluetooth or other device option.

  1. Wait for the computer to scan the Cricut machine; tick the Explore 3 option from the list.
  2. Now, your cut-die machine is wirelessly connected to the machine.
  3. Go back to Design Space & New Device Setup. Then your Cricut will be displayed as connected during the setup.

For Mac

  1. Switch on the cutting machine and position it within the range of 10-15 feet from the Mac.
  2. From the Apple Menu, tick the System Preferences and press the Bluetooth box.

  1. Ensure Mac Bluetooth is on, and select your Cricut machine from the list of devices on the screen.
  2. Your Cricut Explore 3 will come paired with your associated Mac.
  3. Your Cricut will appear as connected in Design Space and the new device setup.

Apart from connecting it to PC, Cricut can also connect the machine to your mobile device for better connectivity. However, for that visit, you need to check out the next section.

How to Connect Cricut Explore 3 to Mobile Using Bluetooth?

All the freshers are directed to go through the following part of the post, as it will help you to connect your device to the machine wirelessly.

For iOS

  1. Firstly, guarantee that your iOS device Bluetooth is open and placed within the asked range.
  2. Then, tick the Settings icon and move the toggle to the right side to open the Bluetooth.

  1. After that, choose your Cricut machine from the devices list once Bluetooth is on.
  2. Next, details about connecting Explore 3 with the iOS device will be displayed.
  3. Lastly, you’ll be redirected to the Design Space & New Device Setup. Your Explore 3 will be shown as connected during the setup process.

For Android

  1. Before initiating a Bluetooth connection, keep your mobile within 10-15 feet of your machine.
  2. Next, scroll down the Home screen and tick the Bluetooth symbol.

  1. If the Bluetooth is disabled, you must enable it until the scanning process is complete.

  1. After the scanning process is over, select the Cricut Explore 3 option.
  2. Here you go! Your electric cutting machine is now paired with an Android device.
  3. The Explore 3 will be shown as connected during the setup process on the Design Space new device setup page.

How to Connect Machine Using USB Cable?

In addition to connecting the Cricut with PC and mobile devices via Bluetooth, you can also connect using a USB cable. In the meanwhile, go through the steps in the section below:

  1. While unboxing the machine, you’ll notice that the USB cable will be provided.
  2. Unplug the cable and put one end of the cable into the PC’s USB port and the other end into the backside of the machine.
  3. You need to make sure Cricut is on. Then the power button of the machine will light up in white.
  4. After that, you’ll be redirected to the Design Space & New Product Setup page.
  5. You will notice that the machines will share the connection during the setup process.

Frequently Asked Questions

Question:  What are the items available inside the Explore 3 box?

Answer: While opening the delivered box, the total number of items that will be given to the buyer includes: Cricut Explore 3, Premium Fine Point Blde+ Housings, Accessory Adapter, Manual, Safety Guide, Warranty Card, USB Cable, Power adapter and Power cord, Materials for test cut & Bonus materials.

Question: Does It Matter How I Route My Cricut Explore 3 Power Cord?

Answer: Yes, it matters how you route the machine power cord. t has a 90-degree connector that ensures Smart Material doesn’t come in contact with the power cord as the material exits the machine back. You are guided to place your power cord where the material movement is unobstructed.

Visit – design.cricut.com/setup
Cricut.com setup windows
Cricut.com design space
Cricut.com/setup
www.cricut.com/setup

How to Use Design Space for Cricut Setup for Mac?

How to Use Design Space for Cricut Setup for Mac?

Congrats if you have just bought your Cricut machine. It is an amazing machine to start crafting. Cricut has an incredible line-up of cutting and heat press machines to help regular crafters make profits. Design Space comes with all Cricut machines and offers several amazing features to help crafters in their journey. The new users may have questions about how they can do Cricut setup for Mac. So, it’s pretty simple. All you need is a compatible Mac system and Design Space to set up your latest Cricut machine. We will learn the whole process in easy steps. Here we go.

Does Mac Support Design Space?

Design Space can work on any operating system if it meets all the recommended system requirements. You can set up Design Space on Windows, Mac, iOS, and Android. It works the same for all operating systems without any hassle. In the case of Mac, you will only need Safari to browse Cricut’s official website. Plus, you are expected to have a Cricut account to log in to that to start designing. Then, you can start making your first project using your latest Cricut machine. You will get all the required equipment inside the Cricut’s box.

Does Mac Require Anything Specific to Set Up Cricut?

There are some specific requirements Mac has to set up the Cricut machine. Design Space is compatible with systems that meet minimum system requirements for its setup procedure. If your Mac doesn’t meet those, it will be difficult to set up Cricut on that. Let’s quickly see what those are.

Operating system – macOS 11 or later

CPU- 1.83 GHz

RAM– 4GB

Storage– 2GB

Connectivity- USB and Bluetooth

Display- 1024 X 768 resolution

Internet connection- Broadband ( Maximum 2-3 Mbps)

By ensuring all these requirements, you can easily set up your Cricut machine on Mac.

How to Set up Design Space on Mac [Download & Install]?

The first step to setup Cricut on Mac is to download and install the Design Space. Consider Cricut’s official website to get it on your system. The process of setting up Design Space is straightforward. The software offers you several features for professional use. Also, it’s a user-friendly interface, and attractive designs push the users to create something unique.

The best part about Design Space is that it is good for beginners as well as pro users. With Design Space, you can create your desired projects to persuade good clients. Look at the procedure to set up the Design Space for Mac.

  1. Start by unboxing your Cricut machine.
  2. Ensure the machine has all the required items.
  3. Take off all the protective covers from the machine.
  4. Now, use a USB cable or a Bluetooth connection to connect Cricut to the Mac.
  5. Then, open an internet browser on your Mac.
  6. Navigate to design.cricut.com.
  7. After that, select Download.
  8. Then, the Design Space will start downloading.
  9. After downloading the application, go to the Downloads folder.
  10. Locate your file and double-click on it.
  11. A green-colored Cricut logo will appear on your screen; drag it to the Application folder.
  12. Thereafter, the installation will start.
  13. Go to the Applications folder and double-click on Design Space to open it.
  14. Your Mac system will ask you if you want to launch the application.
  15. Then, tap Open to continue.
  16. Put your Cricut ID details to log in to the Cricut account.

Finally, you set up your Cricut on Mac in a few simple, easy steps. You should follow every step for a better result.

How to Do Cricut Setup for Mac?

After successfully downloading and installing Design Space on your Mac, you are required to set up your Cricut machine. You just need to use the accessories that came with the Cricut machine. Let’s learn how.

  1. Use a power cord to plug your machine into a power source and turn it on.
  2. Set up your machine with a Mac using a USB cord or Bluetooth.
  3. Go to a browser on your Mac and navigate to design.cricut.com/setup.
  4. Now, follow the above-mentioned steps to get the Design Space.
  5. Go with the on-screen directions to sign in to your Cricut Account.

Finally, you have completed your Cricut setup for Mac. It’s time to create different designs using the Design Space software.

What if Design Space Stops Working on Mac?

Many factors may contribute to the disability of Design Space on Mac. Incorrect security settings are one of the most common reasons for blocking the application. On the other hand, outdated Design Space software may also result in the failure of the software. If it happens, you may have to update the Design Space app and reboot your system. An unstable internet connection may also interrupt your application from working properly. So, in that case, you must troubleshoot your network settings. If nothing works, you can freely contact customer care for a better answer.

Conclusion

The process to set up Cricut on Mac is straightforward. You only require to download and install Design Space on your system and log in to your Cricut account. The screen will guide you through the procedure to set up your machine easily. Plus, ensure that your Mac has all the minimum system requirements. Once you are done setting up your latest Cricut machine on Mac, move to create amazing designs and crafts.

Visit – cricut.com/setup

www.cricut.com/setup

design cricut.com download

design.cricut.com/setup

Cricut.com setup mac

Source URL: –  https://cricutdesignmachine.com/how-to-use-design-space-for-cricut-setup-for-mac/

What Does Flatten Mean on Cricut?[Comparison & Setup]

what does flatten mean on Cricut

Did you recently install Design Space on your system but not know how to utilize its tools? One of the primary tools among the rest is Flatten Tool. If you are searching about What does Flatten mean on Cricut? This is the perfect place. Flatten allows the user to turn multi-layered images into single-layered images.

Besides, it also removes all extra lines from an image and retains all the colors of the multi-layered image. Other than that, it converts SVG images into printable images for Print-And-Cut. The Flatten is involved in creating stickers, labels, decals, etc.

This post contains all kinds of data you are searching for regarding Flatten tool, its comparison, and the setup process.

How is Flatten Tool Different From Weld Tool?

The Design Space contains many tools that allow users to modify their projects. Each tool has its feature and role while creating the project. Flatten and Weld looks like the same tools but are used for different purposes. To learn about the difference between these two tools, have a look at the paragraph explained below:

The Weld tool merges multiple layers into a single-cut layer. However, while using this tool, the merged layer’s colors become one color & the remaining layer is the Cut layer. On the contrary, Flatten tool combines different layers into a single print layer. However, while using the tool, the layer’s colors didn’t get change resulting in the Print Then Cut layer, not a standard Cut layer.

How to Setup Flatten Tool in Design Space?

After coming across this tool’s basics, let’s start setting the tool for creating various projects at the Design Space. The following examples will help you learn how to use Flatten while creating customized projects on the app. Ensure that you step-wise complete the process so that you don’t have to face any trouble in future cases:

Print Then Cut Label

  1. First, open the Design Space and start the new project.
  2. Second, add shapes, images, and text layers to the Canvas. Each shape/text box will be on its layer.
  3. Third, to proceed towards the next step, select the Make It button visible on the top-right side of the canvas.
  4. Next, you need to choose all the layers and tick on the Flatten box.
  5. All the selected layers will be flattened into one layer.
  6. Followed by this, tap Continue, and Cricut will remind you to print the created design on the printer.
  7. Lastly, you’ll be prompted to load the design into the electric cutting machine and proceed toward the cutting process.

Printable Sticker is another project users can create by opting for this program tool. No doubt, you need to investigate the next segment to learn about the process:

Printable Stickers

  1. Commence the process by uploading the image/text of your preference to the program Canvas.
  2. After that, you’ll notice the design pieces won’t overlap, and there is no background shape behind them.
  3. You can flatten the image, combining it into a printable layer.

After creating printable stickers, you can add them to your scrapbooks or greeting cards.

Mock Up Designs

  1. Select everything and place the SVG image on the top of the mock-up background.
  2. After that, tick the Flatten box visible on the Canvas.
  3. The minute after selecting the option, the cut lines will be gone.
  4. You’ll notice that the design will be available on the shirt.
  5. Press the Make It button displayed on the right side of the screen.
  6. At last, the Cricut machine will begin printing on the laded mat.

Using these examples, you’ve discovered how this tool works in crafting the DIY project of your choice.

Conclusion

In conclusion, with the article, we’ve learned that the Flatten Tool is crucial in creating projects on the Design Space canvas. It combines numerous layers into a signal layer and disconnects all the extra layers from the uploaded image. However, the tool can be set up to create a design on the designing app within a few minutes. Moreover, if you’ve any issues with the tool, refer to the following FAQs.

FAQs

Question: What are the important tips to take while working with Flatten tool?

Answer: You need to select more than one layer while using the tool on the designing software. If you haven’t selected any layer, the button will be grayed out, and you won’t be able to use it. Flatten will work no matter whether the layers are overlapping or not. You won’t be able to edit the layers after applying the tool.

Question: Do I have the option to Unflatten an image in Cricut Design Space?

Answer: Yes, you’ll get the option of unflattening an image while designing the project. The Uflatten button will be activated if you’ve chosen the Flatten layer. However, the Unflatten button can be used anytime to disconnect the Flattened layers.

Question: When is the correct time to Flatten the layers?

Answer: You can flatten the layers anytime while creating new designs on the Design Space app. Most crafters use Flatten to combine text along with the shape layers while creating organization labels from the printable vinyl.

Visit – cricut.com/setup
www.cricut.com/setup
Cricut Design Space
design cricut.com download
design.cricut.com/setup

Design a site like this with WordPress.com
Get started